Deployment of Kubernetes on Sunlight.io
The Sunlight Enterprise Platform can act as a private cloud to run the Kubernetes in order to orchestrate the containerised applications while relying on the fault-tolerant and high-performance infrastructure. This tutorial provides the instructions to quickly deploy a Kubernetes platform on top of Sunlight platform.
Create a cluster for Kubernetes
-
Create a cluster of instances to deploy and run the Kubernetes cluster. Please follow this instruction about instances to know how to create a cluster of VMs with specified flavor and image.
-
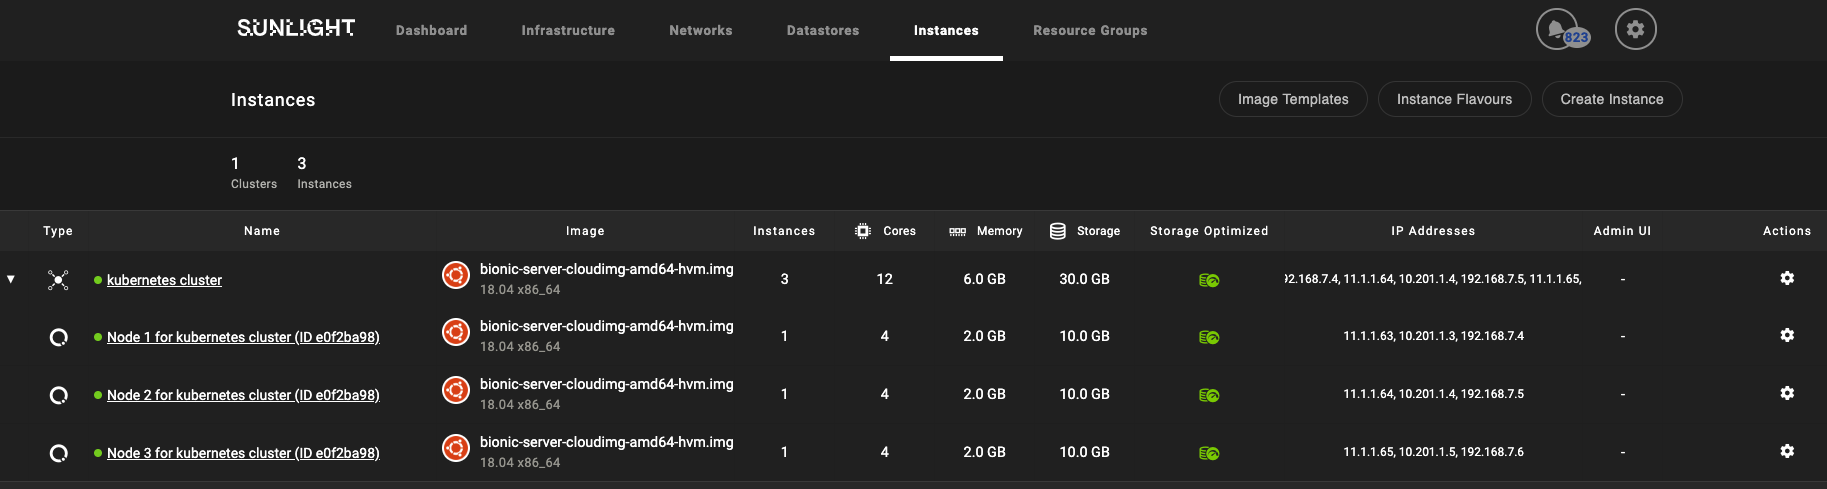
When the cluster of instances are available, the information about network interfaces and authentication of each node in the cluster are available on the Sunlight dashboard. For example, a three-node cluster with Ubuntu 18.04 running on each node are created and showed as below.
Prepare the cluster for Kubernetes
- Select one instance within the cluster as the master node of Kubernetes cluster. Log into this master node and switch to root user, then generate a key pair and add its public key to the authorized_keys file on all the nodes, in order to make it able to access the nodes.
root@instance-79:~# ssh-keygen -t rsa
Generating public/private rsa key pair.
Enter file in which to save the key (/root/.ssh/id_rsa):
Enter passphrase (empty for no passphrase):
Enter same passphrase again:
Your identification has been saved in /root/.ssh/id_rsa.
Your public key has been saved in /root/.ssh/id_rsa.pub.
The key fingerprint is:
SHA256:SgP8KW8jeP35s4Zr4qjKPTs0HPtpD5R9+2Rj3DMleTc root@instance-79
The key's randomart image is:
+---[RSA 2048]----+
|                 |
|   .             |
|    o            |
|   . oo.      .  |
|  . +o=.S.   o E.|
|   *.= o. o . + o|
|  o =.B  o * +   |
|. .+ Booo.B . o  |
|.o.+*.o+++o+     |
+----[SHA256]-----+
root@instance-79:~# cat .ssh/id_rsa.pub
ssh-rsa AAAAB3NzaC1yc2EAAAADAQABAAABAQCtUSVTPeqiRGRP10vGNj+WE3TWGQ6J94q5myhcNLzq68hjYMQUSb6uCEbba/RHyqT059y0RUX0NLwCpUGG7hQJ9QR9mwPCYtPdaa/iWvJlu4/CWTVlSddXDmwODMZ+syo+Uwkv2MiPv7/XUYvVbfZ6LvazYZ4QXzR01UiHI5IsdcGgx9sUePSIaH21WfL7pLfdSQnKXzJs7iLPD4ALsZ3z/Mdkn7fwr8liLdmyWrOXQLfLLlNUNA2Fm1Ej0bv9klC789hQK1XehB/xOU7SB/gs0SHAm5Fiwumkl89oSltjTD7M9eBI6DngxJikKv+JUNQLoqiQO5U6ycBsgj03a+M3 root@instance-79
-
Download the Ansible playbook for automated Kubernetes deployment from here to the master node.
-
Extract the compressed file and edit the inventory file named 'hosts' to provide the IP address of the nodes in this cluster and the role of Kubernetes, as shown in the example below.
[all]
kub_vm1 ansible_host=192.168.7.4 ansible_port=22 ansible_user=root kubernetes_role="master"
kub_vm2 ansible_host=192.168.7.5 ansible_port=22 ansible_user=root kubernetes_role="node"
kub_vm3 ansible_host=192.168.7.6 ansible_port=22 ansible_user=root kubernetes_role="node"
- Log into each of the nodes and install the following packages in order for the above Ansible playbooks to be able to connect.
sudo apt update
sudo apt install -y python-minimal
- On the master node, it is also needed to install the Ansible in order to run the playbooks.
sudo apt-get install ansible
Deploy the Kubernetes
- Run the playbook 'testAll' to verify that docker / kubelet / docker-compose doesn't exist on these nodes.
ansible-playbook -i inventory/hosts playbooks/testAll.yml
- When the results of the above playbook are ok, run the following playbook to install the Kubernetes.
ansible-playbook -i inventory/hosts playbooks/InstallKubernetes.yml
- When the above playbook finished, log into the master node and check the status of Kubernetes via the following CLI.
kubectl get nodes
If you see the output as follows, the Kubernetes has been installed successfully.
NAME          STATUS   ROLES    AGE     VERSION
instance-79   Ready    master   2m10s   v1.13.8
instance-80   Ready    <none>   110s    v1.13.8
instance-81   Ready    <none>   110s    v1.13.8